

This is where I talk about concrete. We were utter novices when we launched into building our set of 7-foot-wide concrete steps. And when I say “we” here, know that it was the unstoppable Mr. TG doing all the literal and figurative heavy lifting.
One of the reasons we went with concrete is that it’s easier for a one-man operation to manage than shifting huge slabs of limestone.
But I’m not talking about the concrete required for a few stepping stones. I’m talking about the fifty-plus 30-kg (66-lb.) bags that the nice folks at Danforth Lumber calculated we’d need. By the time you’ve shifted 50 bags of it, that’s 1,500 kilos or 3,300 lbs. And shifted it had to be – first, from where the delivery truck set down the two skids to an out-of-the-way spot; second, bag by bag into a cement mixer (rented from Home Depot). Then, of course, shifted mixed into the forms.
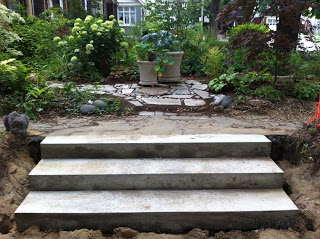
We designed and positioned the steps to fit the grid I mentioned. Tread depths were limited by the space between the front walk and driveway, both of which had to stay. The 6″ risers where to allow a fully opened car door on our side of the shared drive. In the end, we created an 8″ deep top step that connected with the front walk, two 13.5″ lower steps and a 20″ skirt on the ground.
Luckily, my picker’s eye had spotted a 1991 edition of Better Homes and Gardens Step-by-Step Landscaping at Value Village. This great guide, and a couple of online YouTube videos, gave my intrepid builder all he needed to construct the forms. Key advice: Don’t scrimp on materials. And brace the hell out of it.
As we were building on fast-draining sand, we didn’t need to add as much extra drainage compared to on a clay base. The mistake we made, however, was not digging quite deep enough to fight eventual erosion at one end. Live and loin. Mr. TG will be trying to fix that before winter.
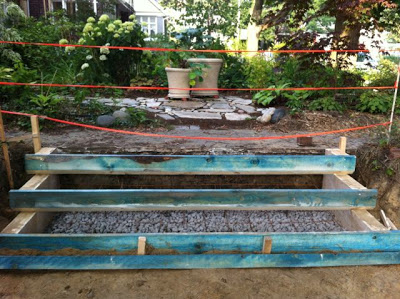
 Multiple rebar stakes, driven in vertically and horizontally, with mesh tied in at every riser level, added stability. You might be able to see that the bottom of each front board was bevelled inward so that the whole tread could be smoothed.
After each pour of concrete, Mr. TG used a stake to push and shake the material into every corner. If he had to do it again, he’d rent a vibrator. (Shame on you, not that kind!) Nevertheless, after two days of curing, the reveal looked good! A few voids to be patched, but not bad for amateurs.
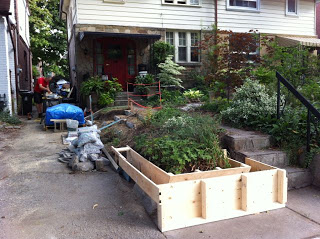
While the steps were curing, Mr. TG went on to build the retaining wall by the front sidewalk. This was done to visually tie-in the new construction with the old construction that had to stay for budgetary reasons. Our goal was to cohesively blend the look of the old with the look of the new.
The design choices made weren’t what we might have done if we’d started from scratch – and had a sizeable budget. However, they were in keeping with the heritage of the house, and met our own functional, aesthetic and cash requirements.
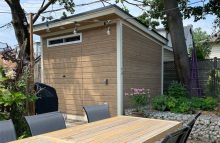
One final note about concrete: it comes in paper bags, and gets hard when exposed to water. As construction was going on in a particularly rainy bit of the long, hot summer 2012, that bright blue tarp at the left was necessary to keep our materials dry. A few bags were sacrificed. C’est la guerre.
Next in our saga: stonework.

1 comment
Working with heavy concrete is hard. I am very impressed, love those steps. The work you all have done took a great deal of planning and figuring. I would have going by the seat of my pants….and messed it up.